Pressure transducers today are more rugged and reliable than ever. Made of stainless steel construction, they provide abundant overpressure protection, improved total error band, and offer negligible orientation and vibration effects. They are ideal for long-term use even in harsh environments of extreme temperature, humidity, and vibration.
Unfortunately, pressure transducer installation sometimes fails. Common issues include: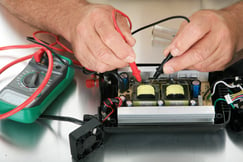
- Improper wiring
- Incorrect polarity
- Short circuits
- Inadequate power supply
- Multiple grounds
- System operations issues
- Problem with pressure transducer
With these issues, there are simple troubleshooting techniques to determine if the transducer is operational.
1. Troubleshooting Assumptions
These troubleshooting guidelines make certain assumptions. Basic assumptions is that the technician is trained, has access to a 24 VDC power source, and knows how to properly use a digital multimeter to measure voltage, current, and resistance. The technician is also assumed to know the best and safest method to test any transducer, which is to remove it entirely from the pipeline and control circuit.
2. Troubleshooting a 3-Wire Transducer Removed from a Pipeline
The 3-wire voltage output transducer is the most commonly used voltage transducer and it is the easiest to troubleshoot. Most likely, the problem with this type of unit is either no signal or the signal is different from what was expected. After the transducer has been removed from the pipeline and control circuit, the technician must identify all terminals for the unit being examined (which can be found in the model's operating instructions). Once terminal configuration has been determined, the technician can power the unit and check if the transmitter is operating properly through placing the voltmeter + lead onto the + signal and vice versa. If the reading is what was expected, then the transducer is operational.
3. Troubleshooting a 3-Wire Transducer Connected to a Pipeline
First make sure that the +24 VDC is connected to the transducer's + excitation and -24 VDC to common. Then disconnect the wire that runs form the transmitter's + signal to the control circuit. Now place the voltmeter + lead onto the transducer's + signal and the voltmeter - onto common. With no pressure applied, the transmitter should provide a voltage output as specified on the unit's data sheet, say 0.1 VDC. If it is, then the transmitter is operation. However, one more check is necessary.
4. Troubleshooting a 4-Wire Transducer Removed from a Pipeline
Once the unit has been removed form the pipeline and control circuit and terminal configuration has been determined, the technician can power the unit by connecting the +24 VDC power supply to the transducer's + excitation and - 24 VDC to the - excitation. Once the voltmeter is connected to the correct signal, when no pressure is applied, the voltmeter reading should equal the analog signal for zero applied pressure.
5. Troubleshooting a 4-Wire Transducer Connected to a Pipeline
Once the transducer is connected to the pipeline and control circuit, disconnect the wire that runs from the transmitter's + signal to the control circuit. Next place the digital voltmeter leads onto the matching transducer signal. If the transmitter provides a voltage output as specified on the unit's data sheet then the transmitter is operational with one caveat. If it's reading 0.0 VDC, it has yet to be determined if the transducer is truly functioning.
6. Troubleshooting a 4-20mA Transducer Removed from a Pipeline
This process is a little more complicated than the previous, because the only instrument that directly measures current is an analog meter. Once the transducer is powered, the 4-20 mA flows from the transducer's - terminal that that is then connected to the + lead of a digital milliamp meter. The meter's - lead is then connected to the - terminal of the 24 VDC power supply. The voltage that is developed in the internal dropping resistor is converted to a milliamp value displayed on the meter's screen. If the milliamp readout is 4 mA with no pressure applied, it's operational.
7. Troubleshooting a 4-20mA Transducer
When the transducer is still connected to the pipeline and control circuit, connect the 24 VDC to the red wire of the transducer. Next, disconnect the wire form the transducer that is connected to the control circuit and place the + lead form the digital milliamp meter to the black wire. Now connect the - lead from the digital milliamp meter to the lead going to the control circuit. If the transducer provides 4 mA output signal with no pressure applied, then the sensor is operational.
CLICK HERE to learn more specifically how to troubleshoot a Setra pressure transducer.
